Portfolio
Documenting what I learn - Labs, CTFs, etc.
OverTheWire Bandit Levels 11 - 15
by Jason Chan
I have decided to complete OverTheWire Bandit Levels 11-15 to learn more about Linux commands and networking. I will complete TryHackMe’s Linux Fundamentals next week to solidify my Linux foundations. Anyways, onto the levels!
[Level 11]
What we had was basically a text file that was encrypted with ROT13. ROT13 is a simple substitution cipher; basically, you rotate/shift each letter in the alphabet 13 places. A<->N, B<->O, M<->Z, etc.
To find the password, we have to somehow rotate and shift the letters by 13 again (this would reverse the ROT13 encryption) since the alphabet has 26 letters and was already shifted 13 places by the initial ROT13 encryption.
tr [ -cds ] [ string1 [ string2 ] ]
This command is essential in solving this level. tr is used to translate or delete characters. Specifically, in this use case, you could translate letters found in string1 to corresponding letters found in string2.
For ROT13, the tr command to rotate 13 places is tr 'A-Za-z' 'N-ZA-Mn-za-m'.
For all letters in string1, we map them onto string2. So, the first string encases all letters (uppercase and lowercase), and the second string does the mapping. So for all letters in A-Za-z that we find in STDIN, map them onto N-ZA-Mn-za-m. All uppercases would be mapped to N-ZA-M, so A->N, M->Z, N->A, Z->M. The same is applied to lowercase letters with the same logic. I know this is pretty confusing, but here is a little representation of what is happening. Below is an example of the mapping, before and after ROT13.
ABCDEFGHIJKLMNOPQRSTUVWXYZabcdefghijklmnopqrstuvwxyz
NOPQRSTUVWXYZABCDEFGHIJKLMnopqrstuvwxyzabcdefghijklm
Now, since tr uses STDIN, we must feed something into STDIN to get an output. In this case, I used echo with piping to solve this level.

Echoing contents of text file to be translated with tr
[Level 12]
Cool level that deals with decompressing and extracting files. We are given a hexdump that has been compressed several times. But before that, we need to create a space where we can work.
OverTheWire suggests creating a temporary file inside tmp. We can do this by navigating to tmp and manually doing mkdir, or we can use the mktemp -d command to create a unique, randomly named directory in tmp.
Now, after creating a temporary directory, we need to reverse the hexdump given to us. Luckily, there exists a command to do just that.
xxd -r [filename]
The xxd command creates a hex dump or reverses it.
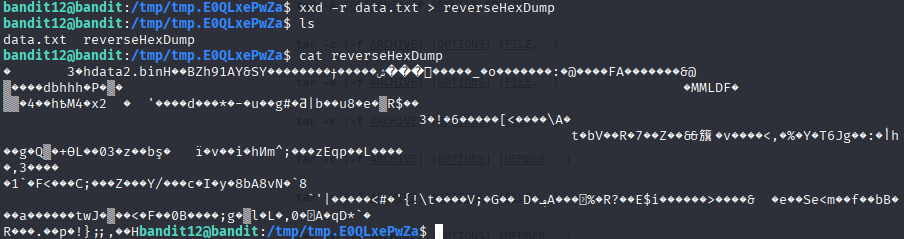
Reversing the hexdump and outputting it into a file called reverseHexDump

Tried to reverse the reversed hexdump for experimentation, didn’t work… but found out hexdump was a compressed gzip
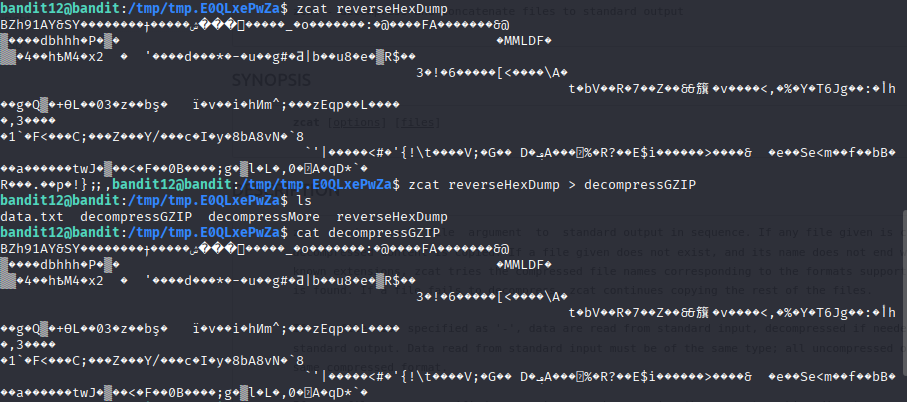
Decompressing gzip with zcat command
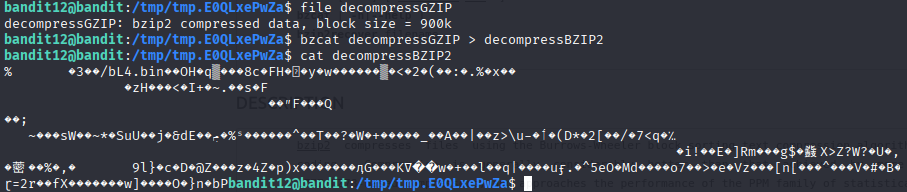
Decompressing bzip2 with bzcat command

Further decompression reveals a tar file
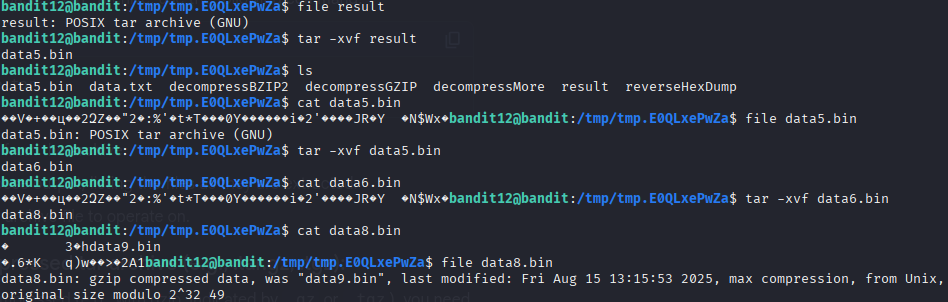
tar -xvf [filename] was used to extract the tar archive.
-x extracts the file from the archive.
-v lists the file extracted.
-f defines the tar archive to extract from.

After extracting and decompressing, we finally end up with data8.bin, a gzip compressed file, which was then decompressed with zcat
[Level 13]
In this level, we are given a private SSH key and tasked with getting into level 14. This was relatively simple.
ssh -p 2220 -i [SSH Key Location] username@hostname
We know previously that -p indicates the port to connect to. By adding the -i flag, we indicate a file (private key) to use with the ssh command.
[Level 14]
So, for this level, we must submit a password to port 30000 on localhost.
Using ssh will result in a connection refused error message. This is because there is no SSH server listening on port 30000 on localhost…
To bypass this, we need to talk to the TCP/UDP ports directly. We can do this with the nc or netcat command. We basically opened a pipe to another computer’s port, allowing us to send raw bytes over.
nc [options] hostname port
One option that I discovered that was useful in determining if the connection was successful was -v, which prints out the result of nc.

Using the nc -v command to connect to a TCP port
Now, in the TCP port, we just need to paste in the password found in /etc/bandit_pass/bandit14 to get to the next level. This can be done with basic traversal using cd
[Level 15]
This level deals with the backbone of security for communications occurring over the Internet.
SSL stands for Secure Sockets Layer.
TLS stands for Transport Layer Security.
Both are protocols that allow data to be sent over the network securely by encrypting data and authenticating the server (and optionally the client). SSL is a bit outdated, so TLS is used as its replacement.
Without SSL/TLS, data that is sent in plain text can easily be seen/sniffed. For example, what we did on Level 14, the information we sent over, can be easily seen. However, with SSL/TLS, the password would be encrypted, making sure that only the intended server can decrypt it.
The interaction between the client and server is usually done in a TLS handshake. This is where the client and server establish guidelines on how data should be encrypted, authenticating and verifying identity, and establishing session keys.
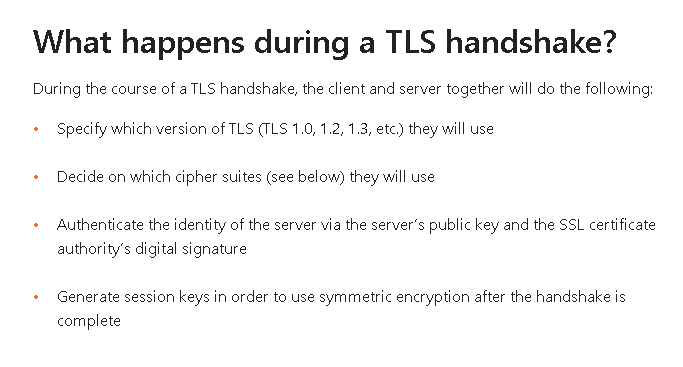
Credit to Cloudflare
Now, to open a secure communications channel, we have to use the openssl command.
openssl command [ options ... ] [ parameters ... ]
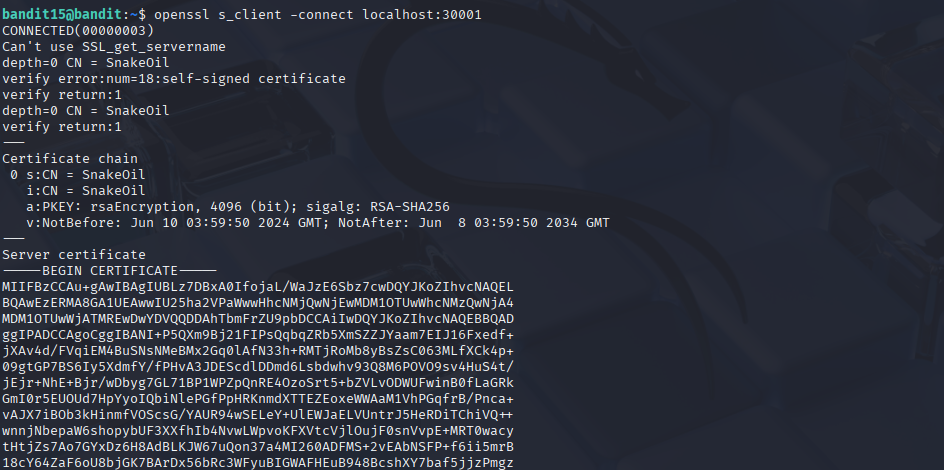
Using the openssl command to connect securely
s_client is a subcommand of openssl to test SSL/TLS connections
-connect specifies which server and port to connect to
We pass this level by submitting the password for this current level (what we got from Level 14) through the secure channel.
And that’s OverTheWire Bandit Levels 11 - 15. I have learned how to handle different kinds of files, and more importantly, how to communicate and connect to different servers, either by using nc and going through raw TCP connections or using openssl to establish a TLS handshake to communicate through an encrypted TCP connection.