Portfolio
Documenting what I learn - Labs, CTFs, etc.
Setting Up pfSense
Installing pfSense/Netgate Installer ISO File
Before we even do anything, we must install the necessary software. Search for pfSense on your browser and locate the Netgate Installer. Previous versions of pfSense did not require an installer; however, for the most up-to-date pfSense CE (Community Edition), you must create an account on Netgate to download it. If you do not wish to create an account, you can get outdated versions of pfSense from this mirror.
I personally got the ISO version because I will be installing pfSense onto a virtual machine with VMware.
Setting up VM
After you have installed the ISO file for pfSense, you will need a virtual machine to run it. I am using VMware. Create a new VM and specify to use the pfSense ISO file.
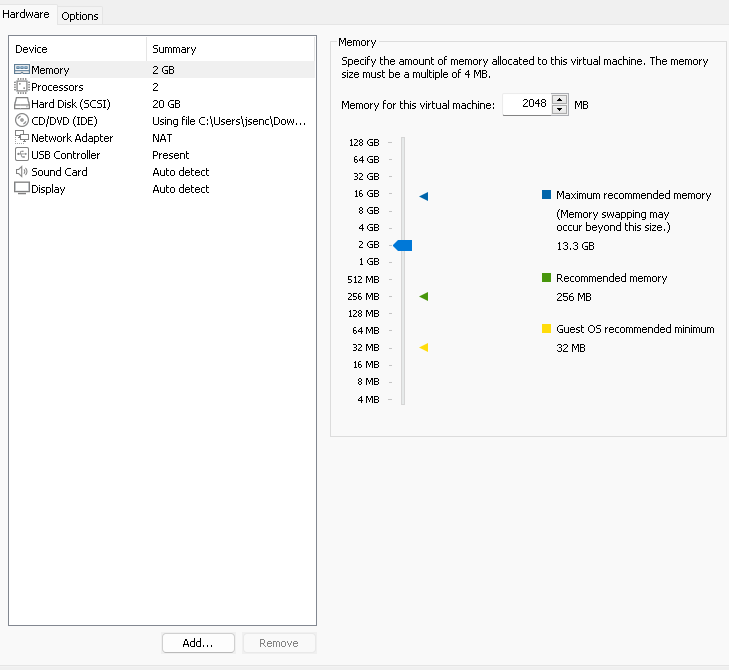
The specs for the virtual machine:
- 1 Processor with 2 Cores
- 2 GB RAM
- 20 GB Disk
Processor/cores should not really matter too much - the virtual machine will run only the console, which is not performance-heavy. If you want to collect logs, I recommend 20 GB for the disk or even more. I am personally planning on collecting logs through Splunk (I will touch upon this in a later subpart).
For the specific network adapter, I selected NAT (network address translation). This allows the VM to have internet access while also isolating it from the physical network. VMware will perform network address translation for outbound traffic while forwarding return traffic to the correct VM.
Installing pfSense Inside VM
After creating the new VM and everything works, you should see the Netgate Installer in the VM.
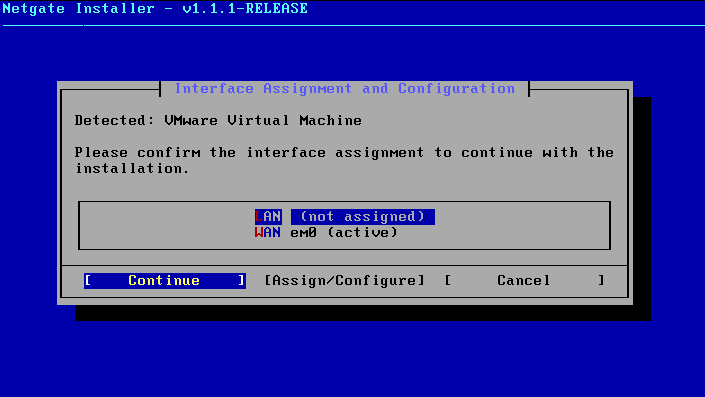
The WAN (Wide Area Network) is already active due to NAT from our hypervisor, providing an upstream connection to the pfSense VM.
Our task is to install pfSense onto the LAN (Local Area Network) interface, which is the currently inactive one (since we have yet to set it up). We will be essentially configuring the LAN interface since this represents the network that pfSense will protect.
Follow through with the installation:
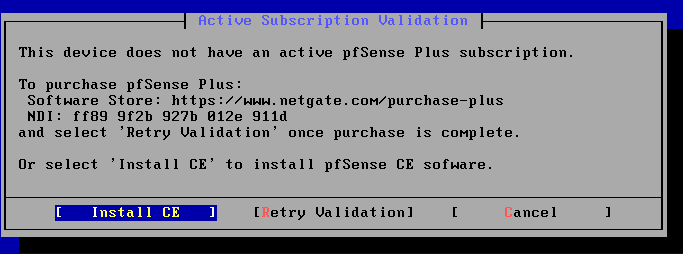
We will use the CE (Community Edition)

It is okay to select Stripe for a lab environment
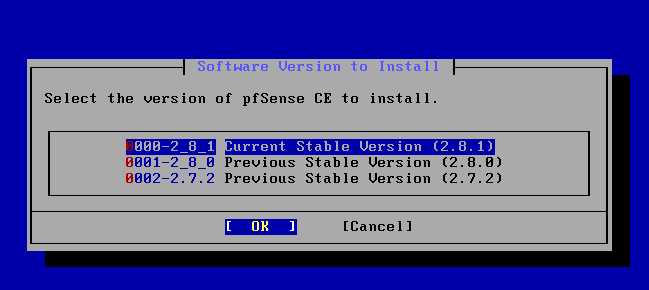
If you chose to download pfSense from the mirror, the latest you would have is 2.72
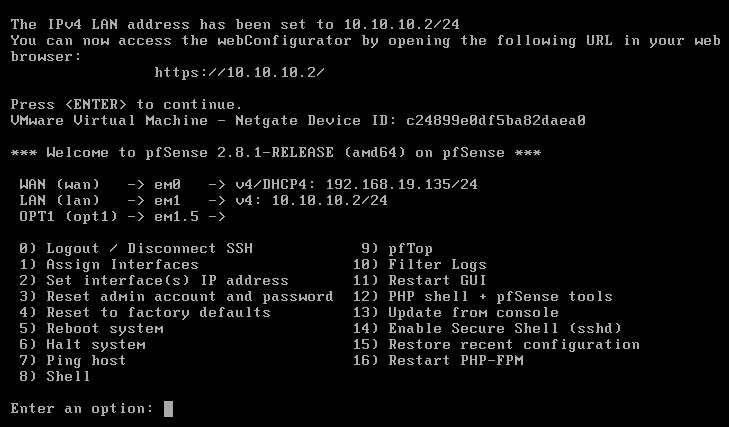
After the installation is complete, you should see the pfSense console, which looks something like:
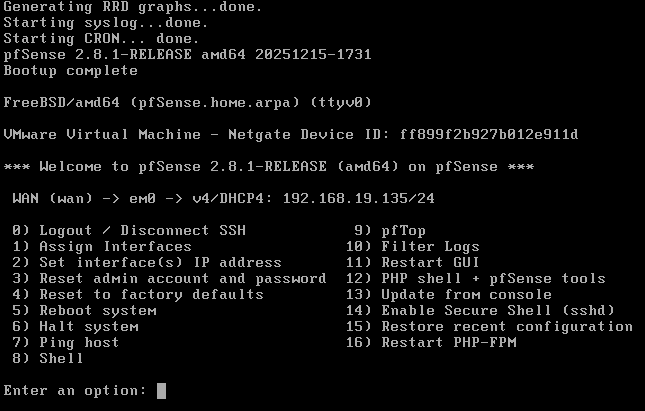
From the picture, we see that we have an IP address for our WAN (assigned by DHCP); however, we are missing our LAN. This is because when we created our VM, only one virtual NIC (network interface card) was created (by NAT).
The LAN will represent our internal network; we must add another network adaptor to create a LAN. To do this, we must go into the VM settings and add another network adapter. Follow along!
Click Add near the bottom
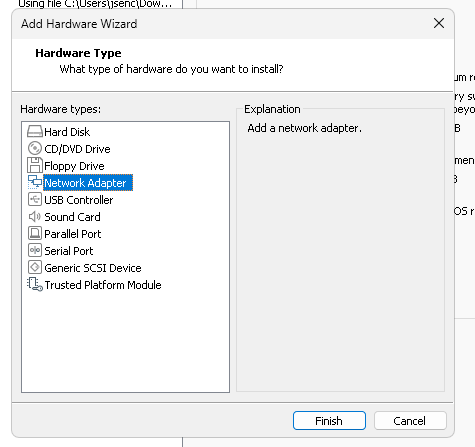
Select Network Adaptor
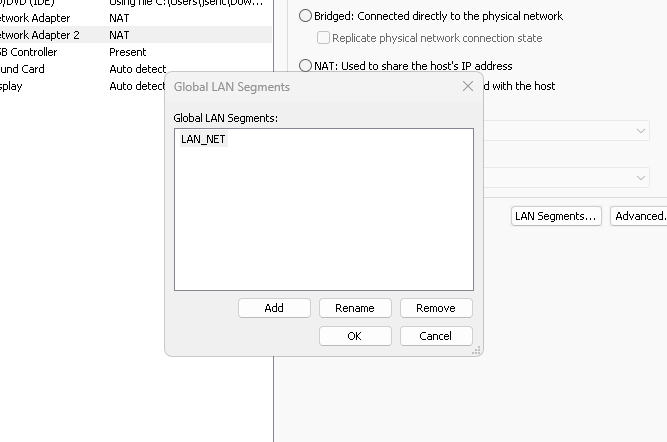
Select LAN segment, and proceed to name your LAN
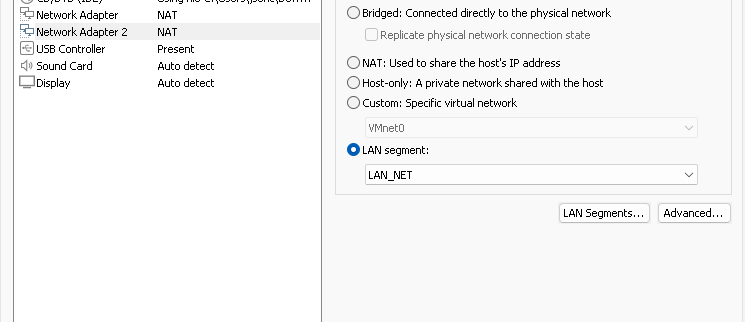
Finally, select your newly created LAN segment
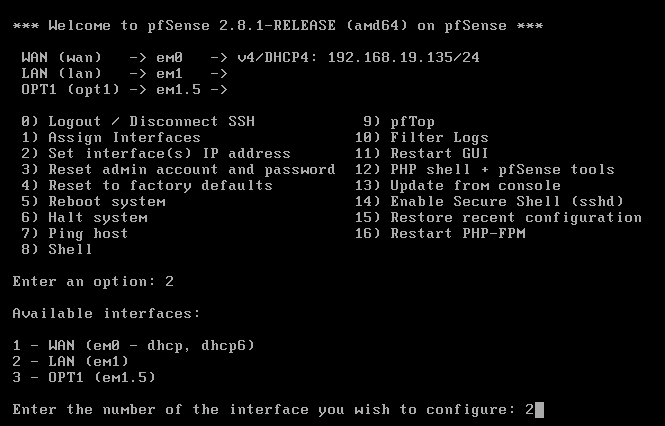
After rebooting the pfSense console VM, you should see your WAN and LAN interfaces. You can ignore OPT1 here. I created a VLAN (virtual LAN) by just experimenting and have no idea what I really want to do with it just yet
Setting A Static IP Address for LAN Interface
Now, in pfSense, we need to configure the IP address for em1, which will serve as our LAN interface. This is necessary because the LAN is the default gateway for all internal hosts. If our LAN didn’t have a static IP address, hosts behind the firewall may have trouble routing traffic to the Internet, and vice versa.
Additionally, having a static IP address means firewall rules and routing policies always apply to the same subnet.
Inside the pfSense console, we have the ability to configure our interfaces.
Select option 2 to Set interfaces(s) IP address, and then select LAN (em1)
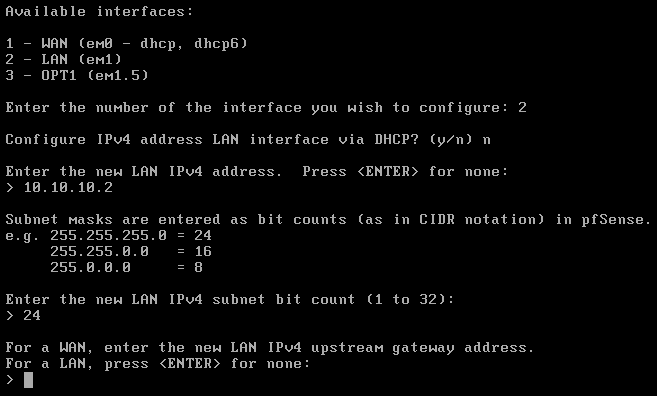
Set the static IP address, and decide on the subnet mask
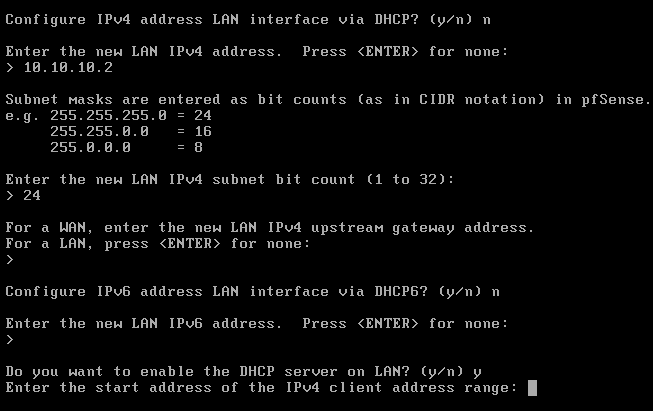
Select Yes to start a DHCP Server within the LAN
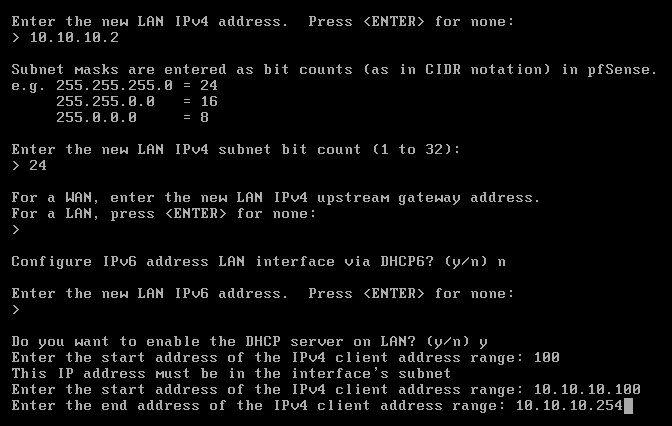
Provide a range for IP addresses for DHCP to assign new hosts
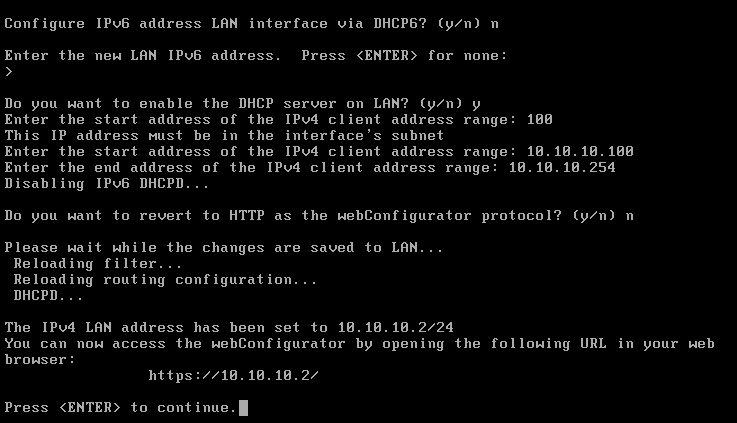
Web configurator can be accessed through the static IP address we have just set
Finished Setup
Summary of Pictures:
- Say
No to DHCP- since we want a static IP Address for our LAN - Set new LAN IPV4 Address:
10.10.10.2 Subnet Mask = 24 (255.255.255.0), this means we have 254 available IP addresses to assign to hosts in this subnet- No Upstream Gateway Address for LAN (Upstream Gateway is the next-hop address to reach another network)
- Start a
DHCP Serverfor the LAN Interface (hosts that join the subnet will be dynamically assigned an IP address)
After we have finished configuring our LAN interface, we can then access the web configurator through 10.10.10.2. Of course, we need to move hosts into the subnet (and behind the firewall). This step will be in my next post on migrating my AD domain behind a firewall.